
A DNS leak occurs when your internet requests bypass your encrypted VPN tunnel and travel directly to your Internet Service Provider's unencrypted Domain Name System servers. This security flaw reveals every website you visit, search query you make, and online service you use to network observers, even while your VPN appears actively connected and displays a masked IP address.
The Domain Name System is the fundamental translation layer of the modern internet. It converts human-friendly domain names like syncvpn.com into computer-readable numerical IP addresses. When you connect to a premium VPN, every single DNS lookup is supposed to be encrypted inside the secure tunnel and resolved exclusively through private, zero-log DNS servers. However, operating system conflicts, aggressive ISP interceptors, and poorly configured network adapters can cause these queries to escape into the open. In this guide, we break down how DNS leaks happen, why they destroy your online privacy, how to run an immediate diagnostic test, and how to fix leaks permanently.
How the Domain Name System Works (And Where It Breaks)
To understand a DNS leak, you must examine how your computer navigates the web under normal conditions:
Every time you type a web address into your browser, click a link, or open an application, your device cannot connect immediately. Computers do not understand alphabet-based domain names; they communicate exclusively through numerical IP addresses. To understand the underlying structure of these numerical coordinates, review our guide on what an IP address is and how it works.
Your device sends a query to a recursive DNS server asking: "What is the numerical IP address for this domain?"
The DNS resolver looks up the domain records across root and authoritative nameservers.
The resolver sends the numerical IP back to your computer.
Your computer connects to the destination web server and loads the page.
Without an encrypted VPN, your router automatically assigns this translation task to your local Internet Service Provider (ISP). Because your ISP operates the resolver, they maintain a complete, timestamped ledger of every domain name you query. While some users attempt to use smart DNS proxies or unencrypted third-party resolvers, these tools fail to encrypt your data in transit; our comprehensive breakdown of VPN vs. Proxy vs. Smart DNS explains why unencrypted resolvers leave your traffic completely visible to network sniffers.
What Happens During a DNS Leak?
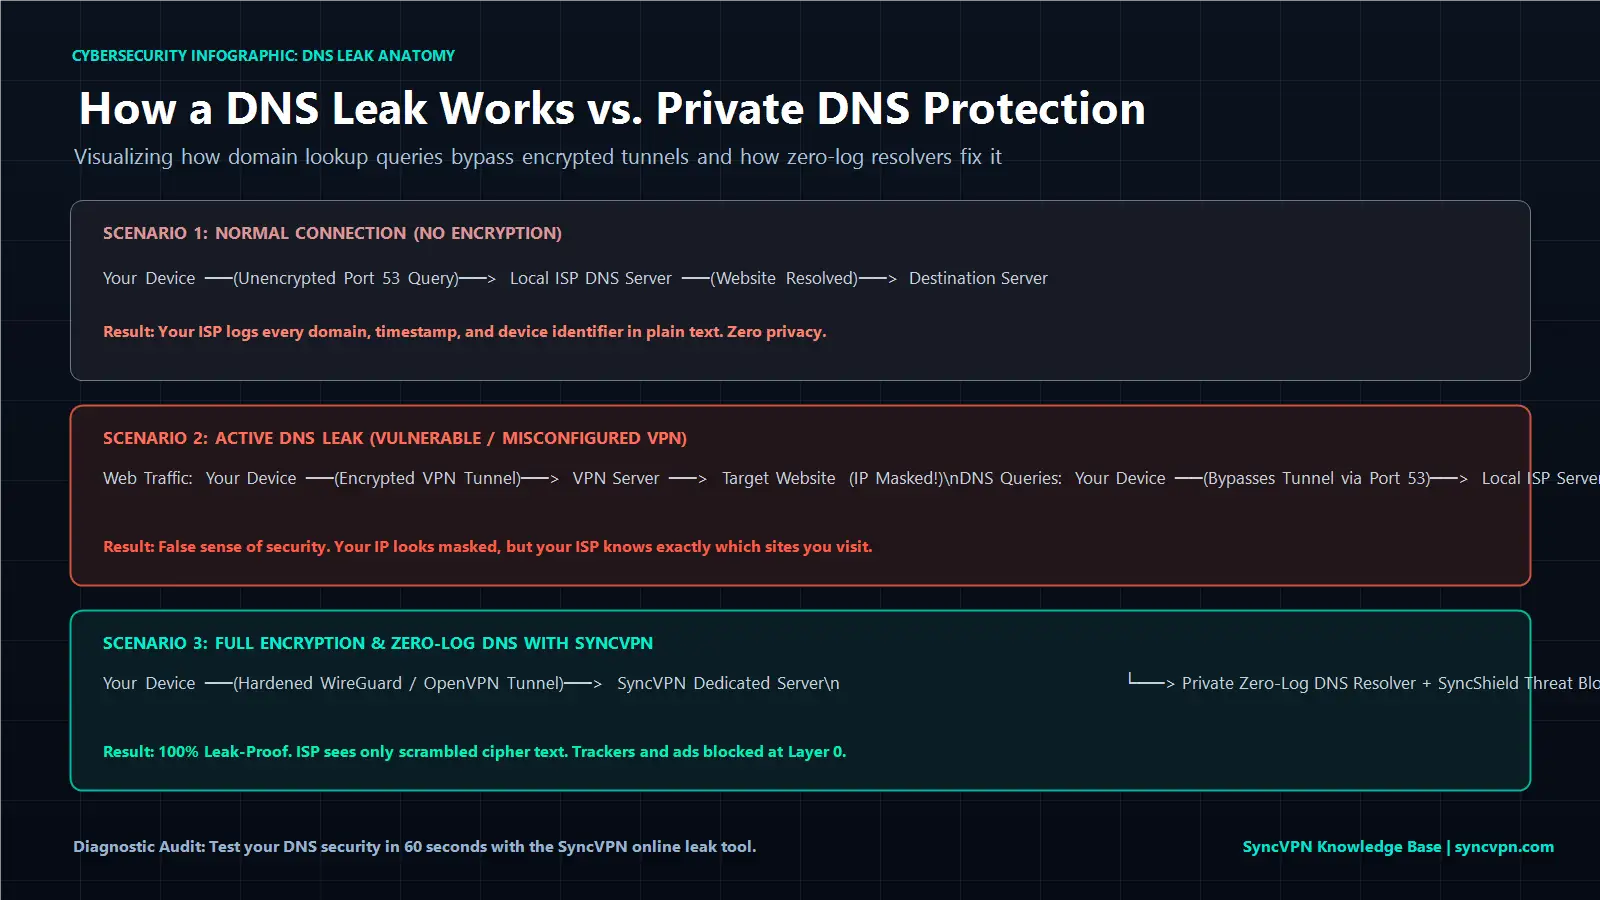
When you connect to an encrypted Virtual Private Network, client software establishes a secure cryptographic tunnel using hardened protocols. Modern protocols like WireGuard and OpenVPN encapsulate both your data packets and your DNS lookups; you can compare how different encryption standards manage connection handshakes in our guide on WireGuard vs. IKEv2 vs. OpenVPN. Simultaneously, the VPN configures your operating system to route all DNS traffic away from your ISP and into private, encrypted DNS resolvers operated directly on the VPN server network.
A DNS leak occurs when this redirection fails.
Your main internet traffic may travel through the encrypted tunnel, successfully spoofing your geographic location on standard IP check websites. Yet, behind the scenes, your operating system continues dispatching DNS lookup queries over your unencrypted local ISP connection on standard Port 53.
The dangerous result: Your visible IP address says you are in Frankfurt or Zurich, but your local ISP logs prove you just looked up your personal banking portal, medical forums, and streaming platforms from your living room. In many instances, misconfigured DNS routing leads to the frustrating issue where your VPN is connected but websites won't load, because your system is caught between conflicting network resolvers.
Primary Causes of DNS Leaks
DNS leaks are rarely caused by deliberate malicious activity; they typically stem from system-level network quirks and aggressive ISP routing tactics:
1. Windows Smart Multi-Homed Name Resolution
Introduced in Windows 8 and expanded in Windows 10 and 11, this performance feature queries all available network adapters simultaneously (Ethernet, Wi-Fi, and active VPN adapters) to accelerate domain lookup speeds. It accepts whichever response returns first. Because local ISP resolvers are geographically closer than a remote VPN server, Windows frequently accepts the unencrypted local response, leaking your browsing history outside the tunnel.
2. Transparent DNS Proxies
Certain aggressive ISPs employ transparent proxy technology to enforce content filtering and surveillance. Even if you manually change your DNS settings in your router or operating system to a third-party provider, the ISP network intercepts all traffic traveling over standard DNS Port 53 and forcibly redirects the packets into their own monitoring resolvers without warning.
3. Dual-Stack IPv6 Lookup Fallbacks
Many residential networks operate on dual-stack architecture (providing both IPv4 and IPv6). If your VPN client routes IPv4 requests securely but fails to manage IPv6 routing tables, modern operating systems automatically dispatch DNS queries over the unencrypted IPv6 interface, exposing your activities.
4. Software Conflicts and Browser DNS over HTTPS (DoH)
Certain third-party antivirus suites, browser extensions, and independent DNS over HTTPS features in browsers like Chrome or Firefox can override your system's network adapter settings. When these external tools take control of DNS routing, they bypass the VPN tunnel and send queries to third-party commercial resolvers.
DNS Leak Root Causes and Solutions Matrix
Review how different DNS leak triggers operate and the technical steps required to neutralize them:
Leak Trigger | Technical Mechanism | Risk Level | Primary Fix |
|---|---|---|---|
Windows Multi-Homed Resolution | Windows queries all physical and virtual adapters simultaneously. | High | Enforce strict single-adapter DNS binding via SyncVPN client. |
Transparent ISP Proxy | ISP intercepts and redirects standard Port 53 queries at the gateway. | Critical | Route DNS queries exclusively through an encrypted VPN tunnel. |
Unmanaged IPv6 Lookups | IPv6 DNS queries bypass IPv4-only tunnels on dual-stack networks. | High | Enable client-side IPv6 leak filtering or native dual-stack routing. |
Browser DoH Overrides | Browser directs lookups to external cloud resolvers over HTTPS. | Moderate | Set browser DNS to use system defaults to inherit VPN protection. |
Step-by-Step: How to Test for a DNS Leak in 60 Seconds
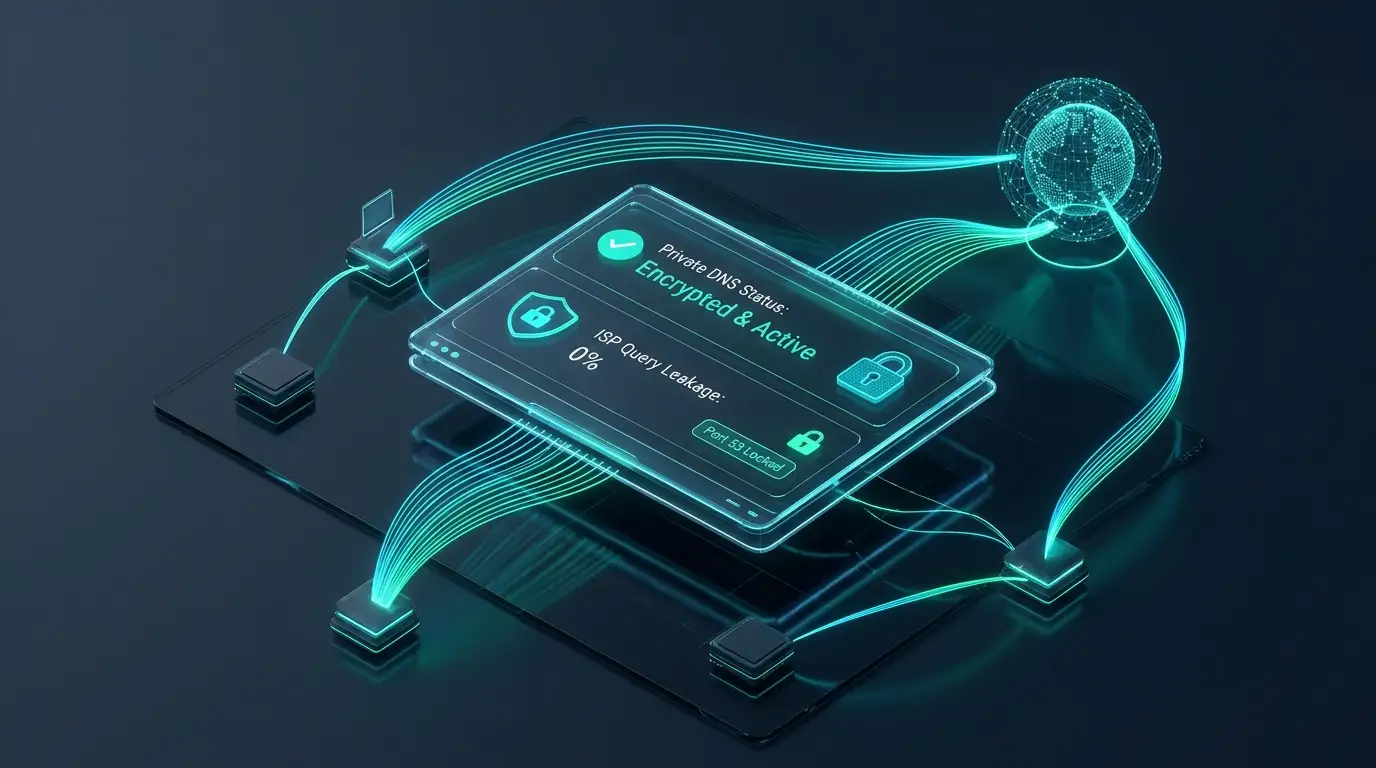
Diagnosing whether your device is currently suffering from a DNS leak requires a simple, objective diagnostic audit:
Verify Your Connection Status:
Launch your VPN application and connect to a server outside your home country.Open the IP and Leak Diagnostic Tool:
In your browser, navigate to the SyncVPN IP and DNS Leak Test.Inspect the Active Resolvers:
Examine the DNS section of the test results.Interpret Your Diagnostic Findings:
Secure Connection: The test displays exclusively the IP address, hostname, and location of the SyncVPN server. No mention of your residential ISP or home country appears.
Active DNS Leak: If you see your home ISP name (such as Comcast, Deutsche Telekom, or Vodafone) or your actual home country listed under DNS servers while connected to a foreign VPN server, your connection is leaking DNS queries.
How to Fix a DNS Leak (3 Proven Methods)
If your audit reveals a leak, apply these proven engineering solutions:
Method 1: Use an Automated Desktop Client with Driver-Level DNS Binding
The most reliable defense against DNS leaks is using an application that enforces DNS routing at the network adapter driver level.
SyncVPN operates its own proprietary zero-log DNS resolvers on every single bare-metal server across its network of over 100 locations. When you follow our official setup to install and use SyncVPN on Windows, our desktop software locks your network adapter to use only internal encrypted resolvers, actively blocking Windows Smart Multi-Homed resolution and preventing unencrypted packets from escaping Port 53.
Method 2: Activate an Automated Kill Switch
A momentary network hiccup can cause your VPN tunnel to reset, briefly exposing background DNS queries to your local ISP. SyncVPN features an integrated Kill Switch on all plans. If the encrypted tunnel disconnects, the Kill Switch instantly freezes all network adapters, preventing your device from falling back to your ISP's resolvers.
Method 3: Disable Smart Multi-Homed Name Resolution in Windows
If you run manual OpenVPN configurations that lack automated client-level protection, you can disable multi-homed resolution using the Local Group Policy Editor:
Press Windows Key + R, type
gpedit.msc, and press Enter.Navigate to: Computer Configuration > Administrative Templates > Network > DNS Client.
Locate Turn off smart multi-homed name resolution.
Double-click the policy, select Enabled, and click OK.
Restart your computer.
The Secret Weapon: DNS-Level Threat Protection with SyncShield
Traditional VPN providers treat DNS merely as a lookup tool. SyncVPN leverages private DNS infrastructure to turn your lookup layer into an active cybersecurity firewall.
With SyncShield, our proprietary DNS filtering technology:
Tracker Blocking at Layer 0: When a web page requests a tracking pixel, analytics script, or marketing beacon, SyncShield intercepts the DNS query at the server resolver and drops it before the tracking code ever downloads to your browser.
Malicious Domain Neutralization: Phishing portals, ransomware delivery nodes, and known malware command-and-control servers are blocked instantly at the resolution phase.
Faster Browsing Speeds: By terminating advertising scripts before their heavy multimedia payloads load, DNS filtering noticeably reduces bandwidth consumption and page load times.
Frequently Asked Questions (FAQ)
Can your ISP see what websites you visit if your DNS leaks?
Yes. If your DNS leaks, your ISP receives every domain lookup query you generate. While HTTPS encryption prevents them from seeing the exact subpage URL or form content, they know precisely which domains you visit and when you access them.
What is the difference between an IP leak and a DNS leak?
An IP leak exposes your device's authentic numerical IP address and physical location to destination websites. A DNS leak exposes the list of website domain names you are visiting to your local Internet Service Provider, even while destination websites see a masked VPN IP address.
Does changing DNS in Windows to 1.1.1.1 stop DNS leaks without a VPN?
No. While using Cloudflare (1.1.1.1) or Google (8.8.8.8) directs lookups away from your ISP's default resolver, standard DNS queries remain entirely unencrypted. Your ISP can still intercept and read plain Port 53 queries in transit, and transparent ISP proxies will override your custom settings.
Summary and Key Takeaways
A DNS leak circumvents your encrypted tunnel, exposing your complete browsing history to your local Internet Service Provider.
Complex operating system features like Windows Smart Multi-Homed resolution frequently trigger leaks on poorly configured VPN connections.
You can audit your connection in seconds using our online IP and leak diagnostic tool.
SyncVPN eliminates DNS leaks through automated driver-level filtering, dedicated zero-log private resolvers across 100+ locations, and integrated Kill Switch protection.
Enabling SyncShield transforms your DNS layer into an active shield against tracking scripts and malicious advertising networks.